A Tale of Two Frames: Freezing Motion with Flash

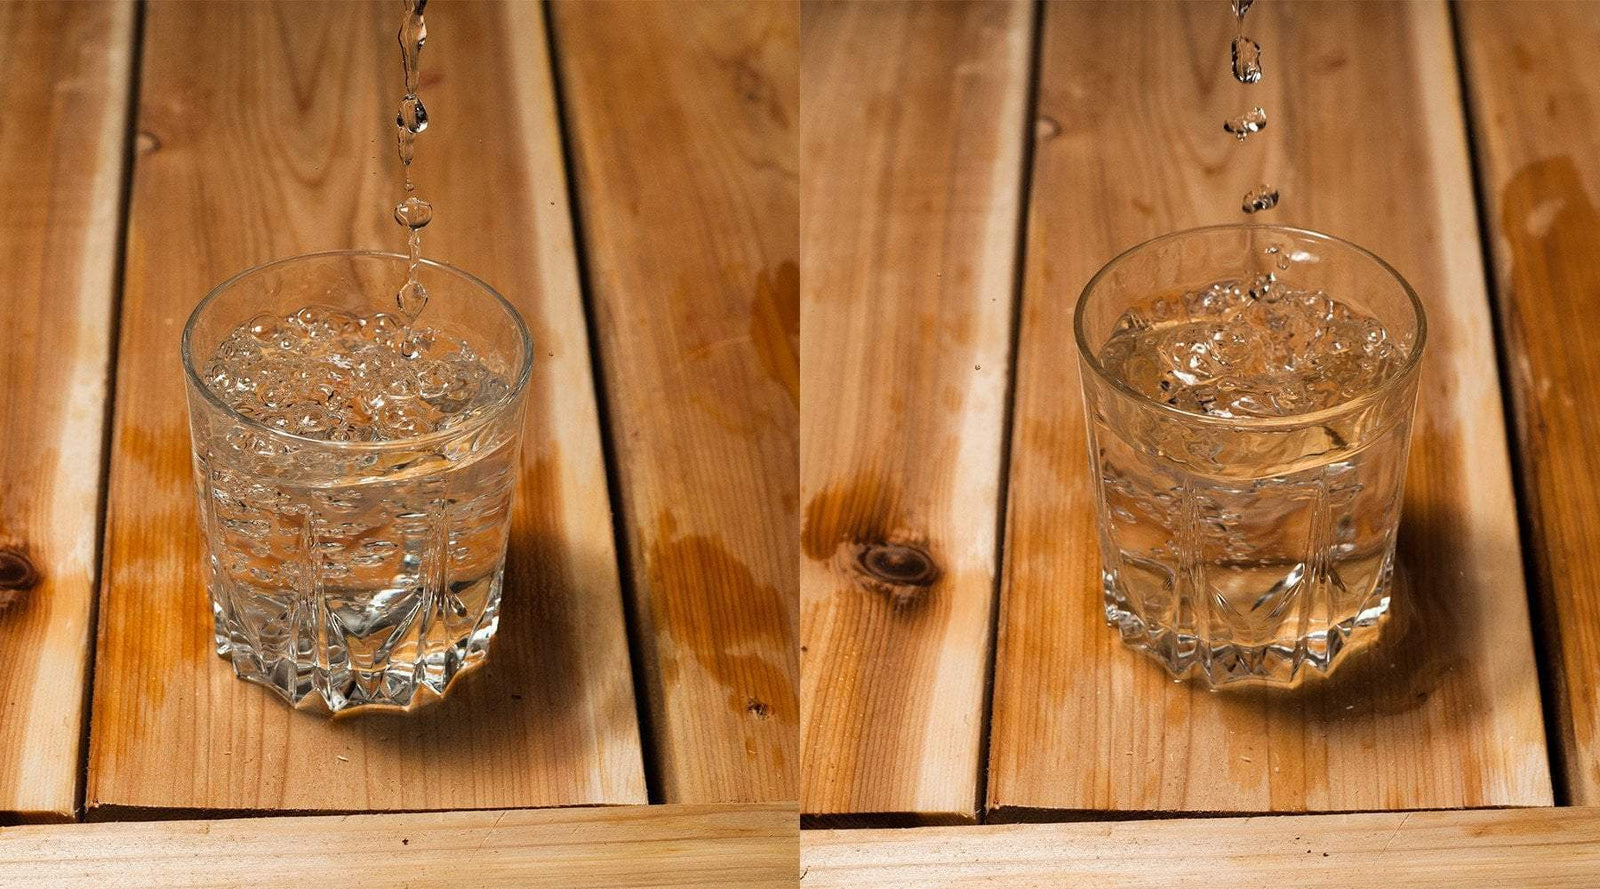
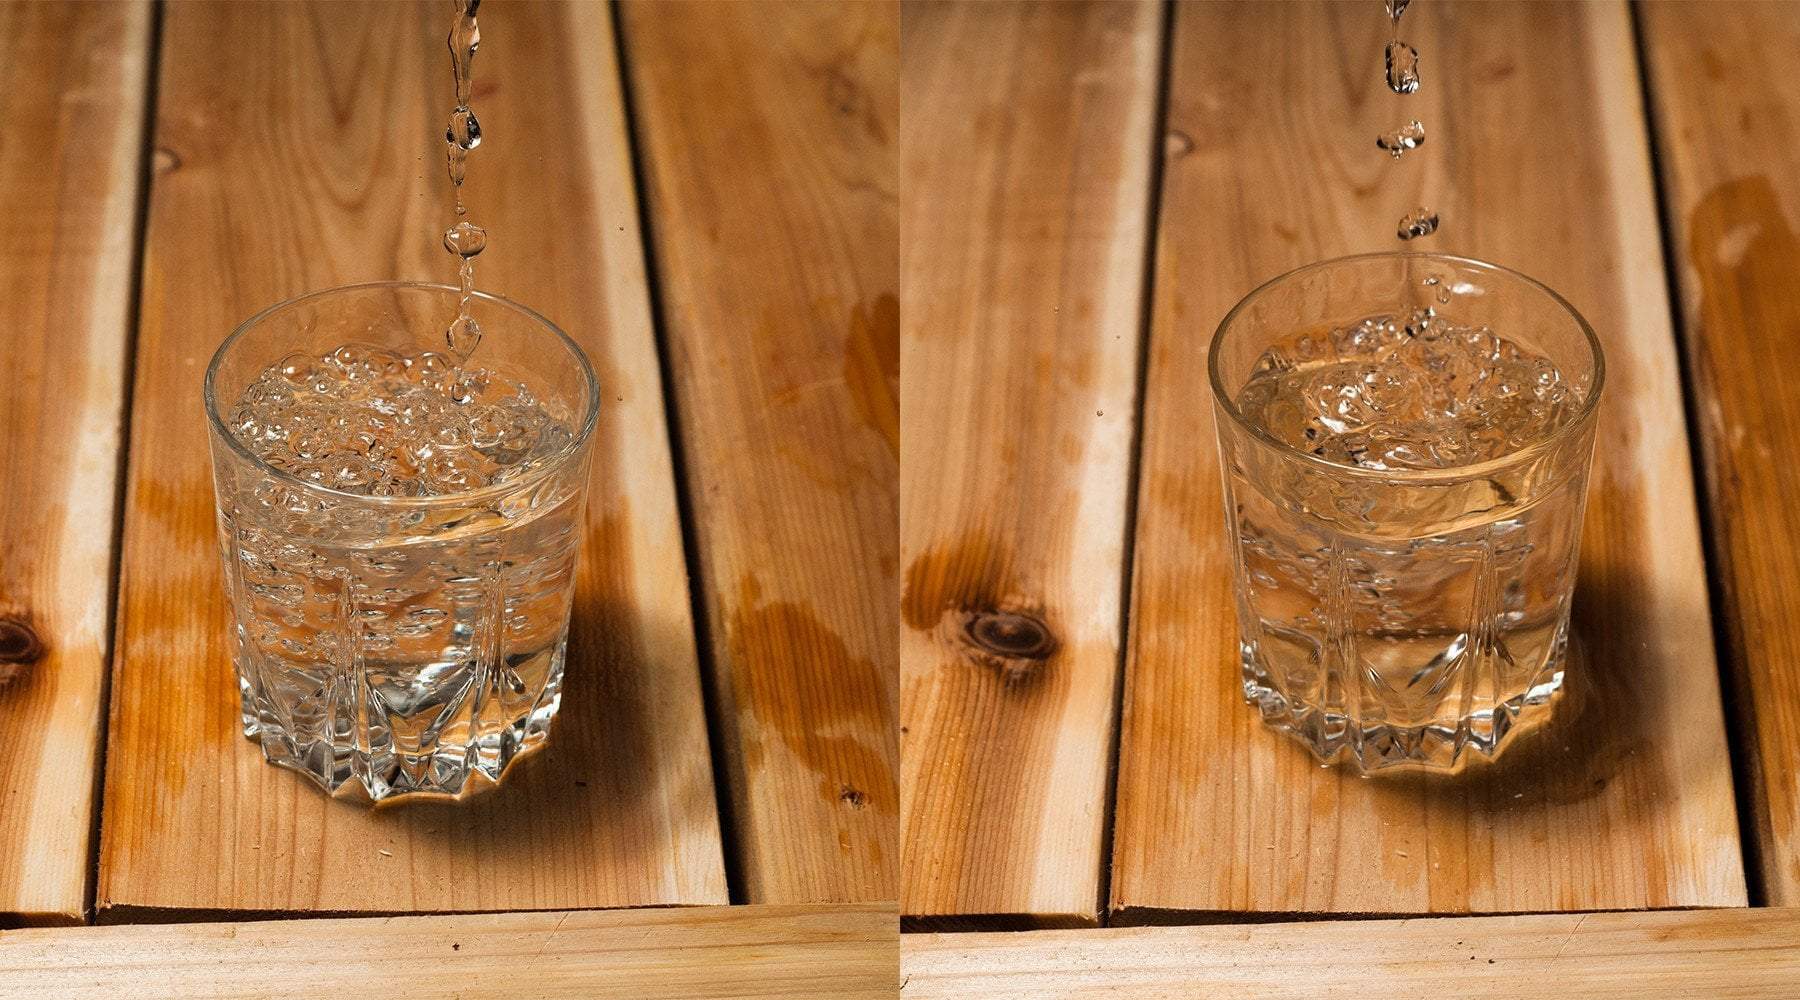
Look at the two images above. There is not much different between them. Both were shot with an identical setup, and both accomplish the goal of stopping motion, and both were captured in the name of science! Excited yet?
We can easily assume that these images were shot with identical camera settings, but we would be wrong. The image on the left was shot at 1/200, f/5.6, and ISO 200. The image on the right was shot at 1/2000, f/5.6, and ISO 200.
For this illustration, I used a Strobepro X60N Speedlite with the Strobepro Speedlite Bouncer from overhead. However, I used two very different methods to obtain the same result. Let’s dive in, and I will explain the advantages and disadvantages of each method.
Method #1: Short Flash Duration (Left)
This method is the more time-tested of the two, and it still has its perks. First, a bit of exposition:
Each camera has a maximum flash sync speed, which is usually between 1/160 and 1/250 of a second. The sync speed is the fastest shutter speed at which the sensor remains fully exposed for a portion of the exposure. Practically speaking, when you go beyond your sync speed with a traditional flash, a big black bar starts to encroach on your frame. That’s the rear curtain of your shutter.
Where am I going with this? Well, if you’ve ever photographed anything quicker than your slowest cousin, you know that 1/250 doesn’t really cut it. Luckily, there is a way that the flash itself can help to freeze motion.
A flash at any power seems basically instantaneous to the human eye, but that pulse does occupy a period of time which we refer to as flash duration. The flash duration on a Strobepro X60 Speedlite ranges from 1/300 of a second at full power to 1/20,000 of a second at minimum power.
For the frame on the left, I first took flash out of the equation. I exposed for a completely black frame (lights out, 1/250 of a second, f/5.6, base ISO). Then, I powered on the flash, and used it to bring the scene to proper exposure. The frame on the left was shot at 1/64 flash power, resulting in an exposure time of roughly 1/10,000 of a second. This, despite a 1/200 shutter speed. Pretty cool, right?
Pros
- Can give you faster exposure times than your maximum shutter speed will allow.
- Lower powered flashes will allow you to shoot in continuous to capture that decisive moment.
Cons
- Because you are limited to your sync speed, you will see motion trails in your frame if ambient light is present.
Method #2: High Speed Sync (Right)
Relatively speaking, High Speed Sync (HSS) is the new kid on the block. How does it work? Well, HSS basically extends the period of time within which the flash releases its energy. When using HSS, your flash behaves more like a continuous light source for a short period of time.
Method 2 is opposite in its approach from method 1. Instead of freezing a moment in time with a quick burst of your flash, you are using a greatly extended flash duration and relying on the more conventional method of freezing action: Your shutter speed.
I first tried 1/1000 of a second, and I could see noticeable motion trails. The frame on the right was shot with a 1/4 flash from my X60N in high speed sync mode, at 1/2000 of a second.
Pros:
- You are able to freeze your subject even in strong ambient light.
- You have a lot more control over your ambient exposure, because your whole shutter speed range is open to you.
Cons:
- HSS at any power uses a lot of energy, which usually rules out continuous shooting.
So, there you have it: Two ways to freeze motion with flash. In photography, there is often more than one way to achieve the result you are looking for. The real trick is knowing when and where to implement a specific technique. Thanks for reading!
Equipment
Strobepro X60N Speedlite, Strobepro XTN Radio Trigger Controller, Strobepro Speedlite Bouncer, tripods, Nikon D3, Nikkor 50mm f/1.8D